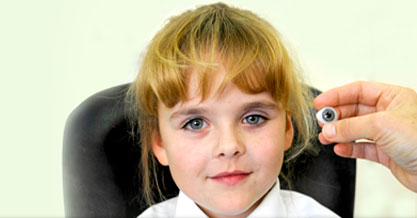
Making a New Eye Prosthesis
An artificial eye is generally made six to eight weeks post enucleation. This is to allow for the swelling to subside and allow the socket to heal.
It takes five stages to make an artificial eye. We generally make an eye over the period of a week.
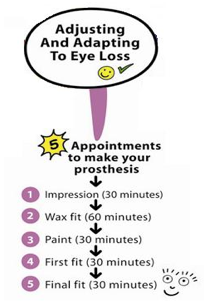
Eye Prosthesis Appointments
While the process is similar around the world, every ocularist has their own techniques and the explanation here may differ from the way your ocularist makes an eye prosthesis.
Making an Artificial Eye First Visit
Impression
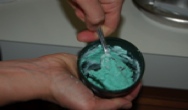
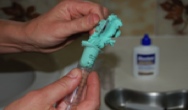
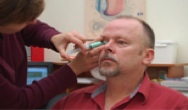
On the first visit we get a cast of the eye socket. This involves mixing a paste, placing it into a syringe and gently squeezing the paste into the eye socket.
The impression paste could best be described as cold and yuck but it doesn’t hurt. In the past we have tried anaesthetic eye drops to reduce the cold sensation, but people told us that the eye drops were more unpleasant than the impression paste itself.
 |
 |
 |
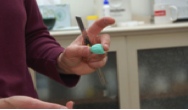 |
Taking an Eye Socket Impression
With young children we may take an impression while the child is under sedation or general anaesthetic. This is not so much because of the sensation of having the impression done but the natural fear children have when they see someone approach them with a syringe full of green paste.
Some ocularists may use an impression tray when taking an impression. An impression tray is a clear lens similar to a conformer shell which may assist in forming the shape of the soft tissue in the socket prior to taking the impression.
Colour Matching the Iris
During the 1st visit we paint an iris. We make our paints from natural oxides mixed with acrylic resin.
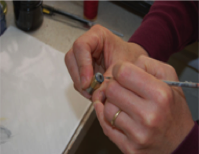 Painting the Iris |
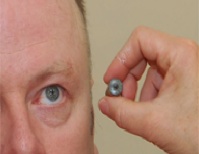 Matching the Iris Colour |
We could take a photograph of the eye and paint from that. The problem with taking a photograph is that we would be painting a copy of a copy, and the result wouldn’t be as good.
If you were to take ten photographs of your eye you would probably see ten different colours of your eye in the photos. This is because the colour of the eye changes with different light conditions and the calibration the camera/ computer and printer.
We also find that this is an important time to enjoy a cup of coffee and talk to the client about their experiences while painting the iris
Making an Artificial Eye Second Visit
Wax Fit/ Shaping the prosthesis
A plastic shape is derived from the impression. This is fitted in the eye socket and adjustments can be made using wax to ensure the prosthesis is comfortable. The iris is positioned into the plastic shape using wax for alignment. By positioning the iris forward you encourage the eye lids to open, and recessing the iris will close the lids.
Sculpting the shape is one of the more challenging tasks of an ocularist. This skill is developed over many years. It is important to communicate well with your ocularist as they can only go by visual perception, and it is up to the client to express any discomfort or pressure points to ensure maximum comfort.
Making an Artificial Eye Third Visit
Scleral Colour matching
By the third visit the iris is embedded in the white plastic. The front surface of the prosthesis is cut back to expose the iris. The sclera (white) of the eye is tinted to match. The veins are created using shredded red cotton.
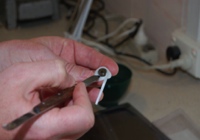 Exposing the Iris |
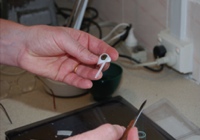 Tinting the Sclera |
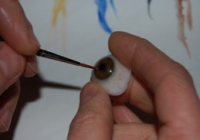 Adding veins |
Young babies tend to have a blue tint to the sclera, as we get older we develop more of an ochre tint.
This is another excellent coffee opportunity, and the visit usually takes half an hour.
Making an Artificial Eye Fourth Visit
Inserting and removing an eye prosthesis
First Fit
On the fourth visit the artificial eye is ready for trying. On this visit we will teach the client how to insert and remove the eye prosthesis for cleaning.
Inserting an Eye Prosthesis
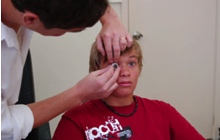
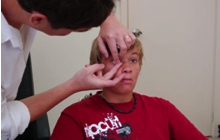
As indicated in the pictures, to fit an artificial eye you need to lift up the top lid to create a gap. You insert the prosthesis under the lid. You may need to gently pull the bottom lid down to allow the prosthesis to fall into place.
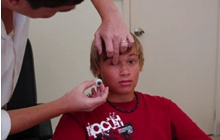 |
 |
 |
Fitting an Artificial Eye
It is a good idea to gently rub the prosthesis as you may trap air behind the prosthesis.
Removing the Eye Prosthesis Using a Suction Cup
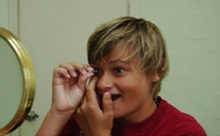
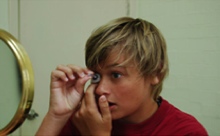
In the early stages it is easiest to use a suction cup. The DMV suction cup is solid rubber and easier to use.
Being solid is also more hygienic as bacteria cannot breed inside. Other suction cups are hollow and you need to squeeze them before use.
To remove the eye you wet the suction cup for maximum grip. Place the suction cup on the eye prosthesis and gently lift up and out. You may need to push the bottom lid under the prosthesis.
 |
 |
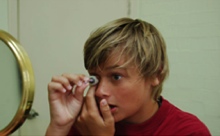 |
Removing an Artificial Eye
You should not use the suction cup for reinserting the prosthesis as it is difficult to remove the suction cup, and it tends to pull the prosthesis back out again.
 Removing the Eye Prosthesis without a Suction Cup
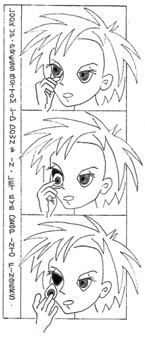
In my original brief to the artist, I asked Joanne to illustrate how she removes an eye prosthesis.
She has worn an eye prosthesis since she was quite young and has become adept at removing the eye.
I was surprised when she returned with the drawings which indicated that it could be removed with two fingers.
She does this by inserting the index finger under the bottom of the prosthesis.
Securing it with the middle finger she is able to remove it chopstick style.
This is possibly a bit advanced for first time artificial eye manipulators.
She was good enough to draw a second set of drawings demonstrating the use of a suction cup.
Making an Artificial Eye Fifth Visit

The Final Fitting
Final Fit
While it is possible to finish an artificial eye in four visits, we generally make a fifth appointment.
There is usually an adjustment to be made before we are happy.
While we say fifth and final visit we may bring people back if further adjustments are to be made.
We also bring people back after a week to ensure the prosthesis has settled in well.
It is important that if you have any problems with your artificial eye, you should contact your Ocularist.
There is a lot of work that goes into making an artificial eye and problems can generally be resolved with a minor adjustment.
Haptic Lens

Ava - Miss Beautiful
Beautiful Ava was born with micro ophthalmia (a small under-developed eye).
At 8 months we fitted a conformer shell over her small blind eye.
This is done to help expand the bone structure around the eye socket.
Shortly after this we made up a coloured haptic lens to improve the aesthetic quality of the eye.
Ava’s mother Tracy contributed her story to our website at Geelen.com.au.
Tracy shares her experience of when Ava was born, and what she has learnt about Microphthalmia.
Maintenance of an Eye Prosthesis
There is a PDF that can be downloaded and printed regarding the information on maintenance of an eye prosthesis. Basically the advice is to wear the prosthesis until it requires cleaning.
This is generally once a month. People who take their eye prosthesis out on a daily basis tend to have a lot more problems with comfort.
There is an oily substance in your tears which will coat the prosthesis this takes approximately two days. When the prosthesis is coated, the eye socket no longer recognises the eye as a foreign body and will stop producing moisture to flush it out.
Do NOT use alcohol products to clean the prosthesis.
If you leave a prosthesis in alcohol over night it will dissolve.
Toothpaste was recommended back in the day but the chemicals used in toothpaste today will damage the plastics.
An eye prosthesis cannot be Autoclaved
Cleaning the eye prosthesis
I recommend cleaning the prosthesis with a wet tissue under the tap. This will adequately remove any protein build up. There are products available for hard contact lenses which are available from your pharmacy.
Sonicbrite have produced an ultrasonic cleaner which is very effective for cleaning the prosthesis.
You should have your eye prosthesis professionally polished annually. This removes any small scratches and protein build up.
It also restores the natural shine which makes the prosthesis more comfortable and aesthetically pleasing. If you are having any trouble with your eye, such as, scratches or irritation, please consult your Ocularist more often.

